下载代码
通过tb官方在GitHub上的仓库可以拉取最新代码,其实你也可以用我fork的版本,里面有细小的优化和改动
GitHub地址:https://github.com/felix-ma/thingsboard
拉取代码:git clone https://github.com/felix-ma/thingsboard.git
导入工程
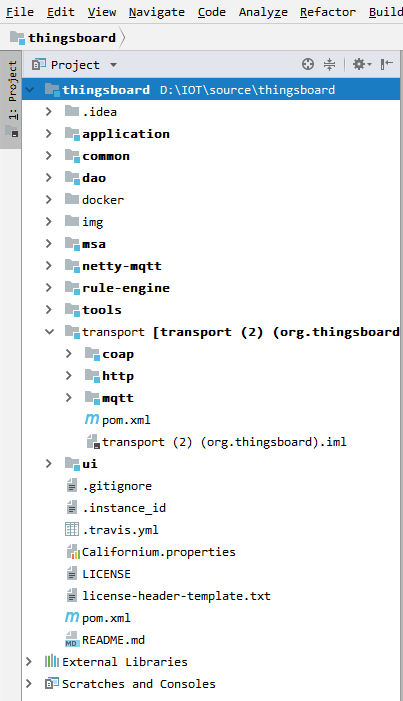
直接以mavne工程导入IDEA中,或者直接open打开刚刚clone的文件夹
我是直接用IDEA打开项目目录的
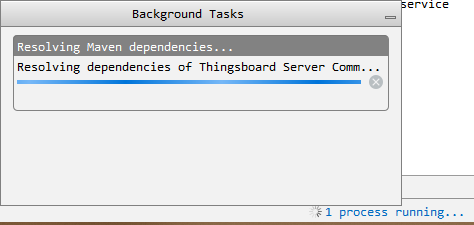
然后就是漫长的等待maven下载各种jar包。
说实话不知道为什么,我总是感觉默认等idea下载jar包,那个maven老是卡死。大概就是这样子,会一直Resolving
这种情况我都是直接关闭当前项目再次打开有可能就好了。
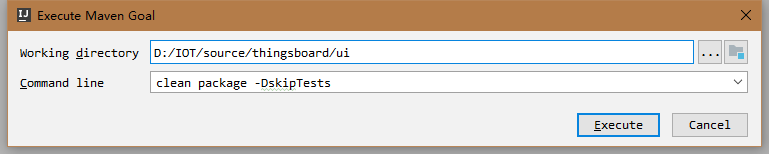
或者直接clean package -DskipTests
当然啦,一开始maven仓库这样执行肯定会报错的。然后就一个错误一个错误去解决
项目编译遇到的问题
1. Failed to execute goal org.fortasoft:gradle-maven-plugin:1.0.8
Thingsboard HTTP Transport Service ................. FAILURE
1
2
3
4
5
6
7
8
9
10
[ERROR] Failed to execute goal org.fortasoft:gradle-maven-plugin:1.0.8:invoke (default) on project http: org.gradle.tooling.BuildException: Could not execute build using Gradle distribution 'https://services.gradle.org/distributions/gradle-2.13-bin.zip'. -> [Help 1]
[ERROR]
[ERROR] To see the full stack trace of the errors, re-run Maven with the -e switch.
[ERROR] Re-run Maven using the -X switch to enable full debug logging.
[ERROR]
[ERROR] For more information about the errors and possible solutions, please read the following articles:
[ERROR] [Help 1] http://cwiki.apache.org/confluence/display/MAVEN/MojoFailureException
[ERROR]
[ERROR] After correcting the problems, you can resume the build with the command
[ERROR]   mvn <goals> -rf :http
点击查看这个网址是否可以正常下载。https://services.gradle.org/distributions/gradle-2.13-bin.zip
如果没反应,翻墙尝试一下,并且在maven中配置代理
1
2
3
4
5
6
7
8
9
10
<proxies>
    <proxy>
      <id>xx</id>
      <active>true</active>
      <protocol>http</protocol>
      <host>127.0.0.1</host>
      <port>8087</port>
      <nonProxyHosts>127.0.0.1</nonProxyHosts>
    </proxy>
  </proxies>
配置好之后继续执行,会下载这些之前无法下载的jar包
1
2
3
4
5
6
7
8
9
10
11
12
13
14
15
16
17
18
19
20
21
22
23
24
25
26
27
28
29
30
31
32
33
34
35
36
37
38
39
40
41
42
43
44
45
46
47
48
49
50
51
52
53
54
55
56
57
58
59
60
61
62
63
64
65
[INFO] Configure project :
Download https://jcenter.bintray.com/com/netflix/nebula/gradle-ospackage-plugin/3.8.0/gradle-ospackage-plugin-3.8.0.jar[INFO] Download https://jcenter.bintray.com/com/netflix/nebula/gradle-ospackage-plugin/3.8.0/gradle-ospackage-plugin-3.8.0.jar

[INFO] Configure project :
Download https://jcenter.bintray.com/org/apache/commons/commons-lang3/3.1/commons-lang3-3.1.jar[INFO] Download https://jcenter.bintray.com/org/apache/commons/commons-lang3/3.1/commons-lang3-3.1.jar

[INFO] Configure project :
Download https://jcenter.bintray.com/org/redline-rpm/redline/1.2.2/redline-1.2.2.jar[INFO] Download https://jcenter.bintray.com/org/redline-rpm/redline/1.2.2/redline-1.2.2.jar

[INFO] Configure project :
Download https://jcenter.bintray.com/org/vafer/jdeb/1.4/jdeb-1.4.jar[INFO] Download https://jcenter.bintray.com/org/vafer/jdeb/1.4/jdeb-1.4.jar

[INFO] Configure project :
Download https://jcenter.bintray.com/com/bmuschko/gradle-docker-plugin/2.0.3/gradle-docker-plugin-2.0.3.jar[INFO] Download https://jcenter.bintray.com/com/bmuschko/gradle-docker-plugin/2.0.3/gradle-docker-plugin-2.0.3.jar

[INFO] Configure project :
Download https://jcenter.bintray.com/org/slf4j/slf4j-api/1.7.5/slf4j-api-1.7.5.jar[INFO] Download https://jcenter.bintray.com/org/slf4j/slf4j-api/1.7.5/slf4j-api-1.7.5.jar

[INFO] Configure project :
Download https://jcenter.bintray.com/commons-io/commons-io/2.4/commons-io-2.4.jar[INFO] Download https://jcenter.bintray.com/commons-io/commons-io/2.4/commons-io-2.4.jar

[INFO] Configure project :
Download https://jcenter.bintray.com/org/apache/commons/commons-compress/1.8/commons-compress-1.8.jar[INFO] Download https://jcenter.bintray.com/org/apache/commons/commons-compress/1.8/commons-compress-1.8.jar

[INFO] Configure project :
Download https://jcenter.bintray.com/org/apache/ant/ant/1.9.3/ant-1.9.3.jar[INFO] Download https://jcenter.bintray.com/org/apache/ant/ant/1.9.3/ant-1.9.3.jar

[INFO] Configure project :
Download https://jcenter.bintray.com/org/apache/ant/ant-launcher/1.9.3/ant-launcher-1.9.3.jar[INFO] Download https://jcenter.bintray.com/org/apache/ant/ant-launcher/1.9.3/ant-launcher-1.9.3.jar

[INFO] Configure project :
Download https://jcenter.bintray.com/org/bouncycastle/bcpg-jdk15on/1.51/bcpg-jdk15on-1.51.jar[INFO] Download https://jcenter.bintray.com/org/bouncycastle/bcpg-jdk15on/1.51/bcpg-jdk15on-1.51.jar

[INFO] Configure project :
Download https://jcenter.bintray.com/org/bouncycastle/bcprov-jdk15on/1.51/bcprov-jdk15on-1.51.jar[INFO] Download https://jcenter.bintray.com/org/bouncycastle/bcprov-jdk15on/1.51/bcprov-jdk15on-1.51.jar

[INFO] Configure project :
Download https://jcenter.bintray.com/org/tukaani/xz/1.5/xz-1.5.jar[INFO] Download https://jcenter.bintray.com/org/tukaani/xz/1.5/xz-1.5.jar

[INFO] Configure project :
[INFO] Compiling script into cache
[INFO] Compiling script into cache
[INFO] Compiling script into cache
[INFO] Configure project :
[INFO] Configure projects
[INFO] Initialize build
[INFO] Build
[INFO] Execute tasks
:assemble[INFO] Execute :assemble
 UP-TO-DATE
[INFO] Execute tasks
:check[INFO] Execute :check
 UP-TO-DATE
[INFO] Execute tasks
:build[INFO] Execute :build
 UP-TO-DATE
[INFO] Execute tasks
:buildDeb[INFO] Execute :buildDeb

[INFO] Execute tasks
:buildRpm[INFO] Execute :buildRpm

[INFO] Execute tasks

BUILD SUCCESSFUL
2. 项目启动后页面打不开
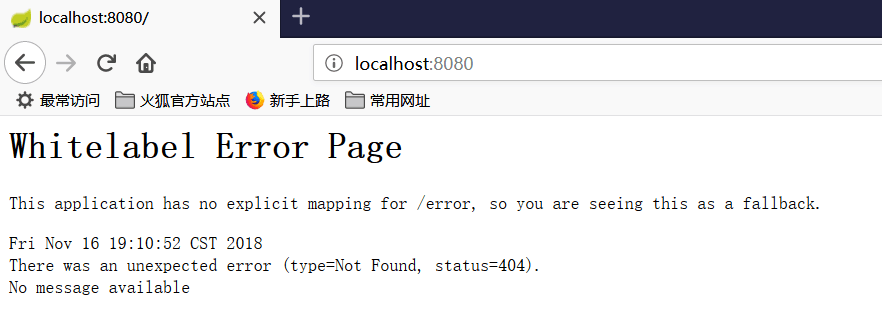
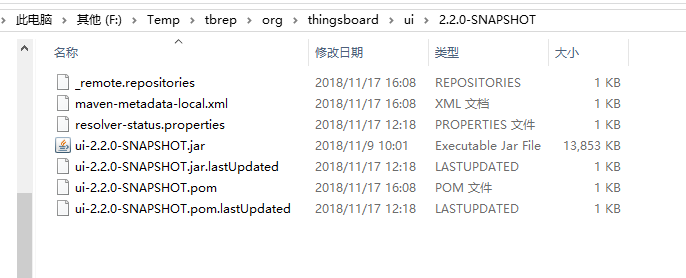
把ui-2.2.0-SNAPSHOT.jar的jar包导入maven仓库中。目录在ui/target/ui-2.2.0-SNAPSHOT.jar
1
mvn install:install-file -DgroupId=org.thingsboard -DartifactId=ui -Dversion=2.2.0-SNAPSHOT -Dpackaging=jar -Dfile=ui/target/ui-2.2.0-SNAPSHOT.jar
导入之后查看maven仓库里面到底有没有这个jar包
可以加入QQ群中下载最新tb(2.2.0-SNAPSHOT)源码jar包,导入自己maven仓库即可
3. 其他杂项
如果正常编译好之后项目一共有这几个module
需要关注的主要有这几个
| module名 | 说明 |
|---|---|
| application | 项目主要服务 |
| dao | 数据查询 |
| ui | 页面展示 |
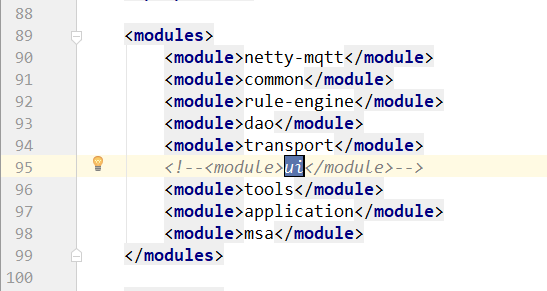
如果maven导入之后能区分出module,那么推荐单个module进行编译。
-
首先把ui编译了。这个最耗费时间。
-
然后把这个ui的jar包给引入maven仓库,注意修改版本号
1
mvn install:install-file -DgroupId=org.thingsboard -DartifactId=ui -Dversion=2.2.0-SNAPSHOT -Dpackaging=jar -Dfile=ui/target/ui-2.2.0-SNAPSHOT.jar
-
最后在整个项目中把ui这个module个删除了。
有些jar包需要手动导入到maven仓库里面。就按照上面导入ui包的方式导入。
注意观察mavne编译时报错,只要缺少org.thingsboard开头的jar包,都需要手动导入。
目前已发现需要手动导入的jar包为:ui.jar tools.jar
其实还有几个是gw需要的jar包,忘记了。 - -!
修改配置信息
tb的配置文件在这里
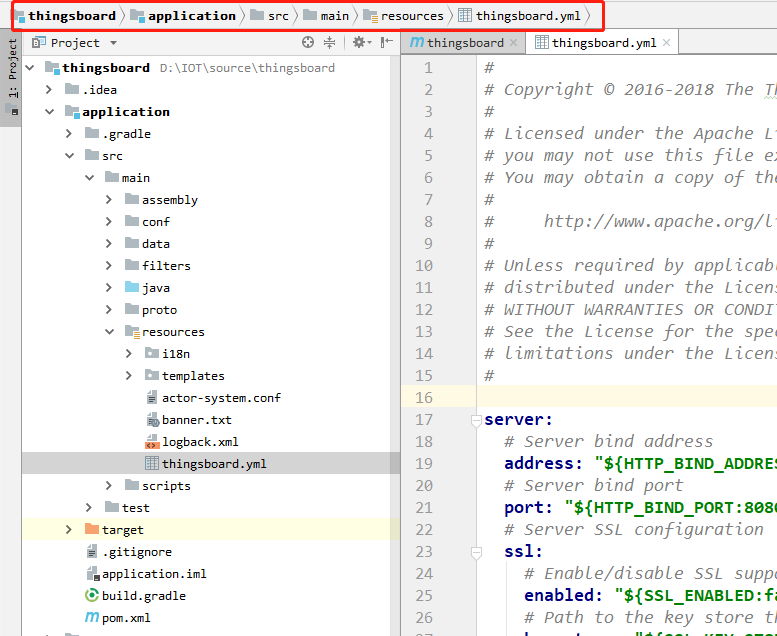
需要修改的地方
| 配置key | 说明 |
|---|---|
| server.port | 端口号 |
| security.jwt.tokenExpirationTime | jwt过期时间,这个由于debug一直报token失效,于是乎被我改为了 15552000 |
| security.jwt.refreshTokenExpTime | 改为 2592000 |
| spring.data.sql | 数据库配置我改为了postgresql |
需要把HSQLDB的配置注释掉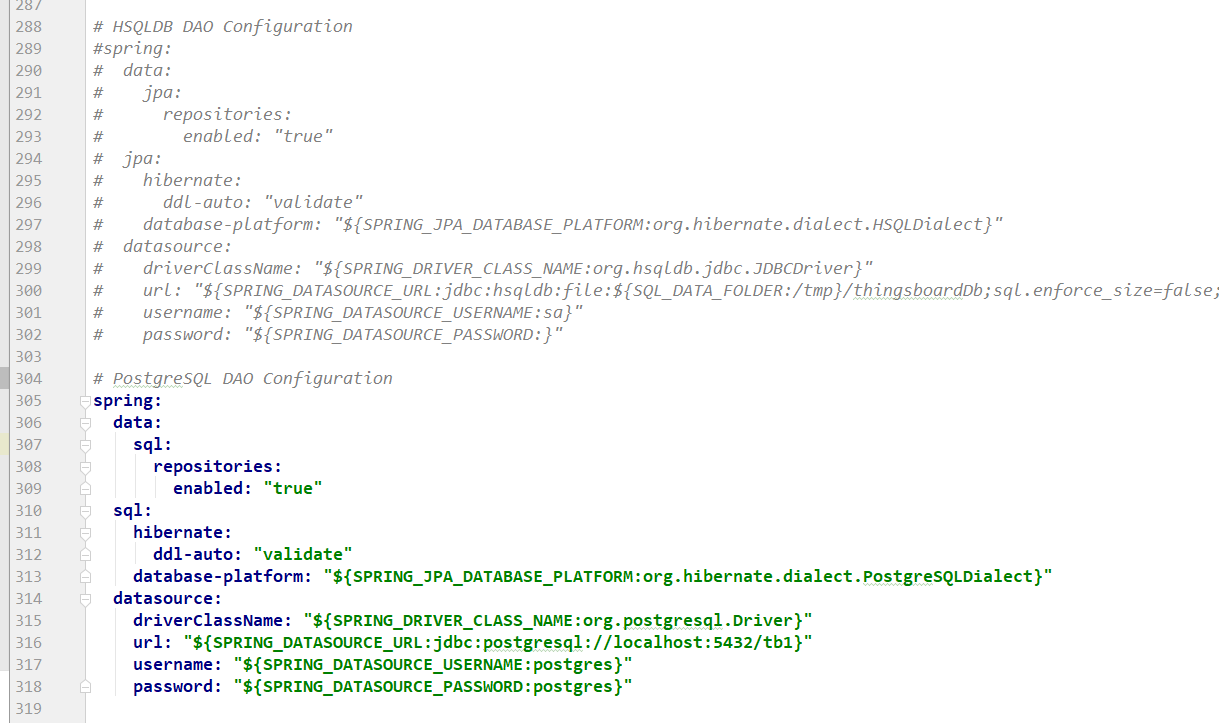
其余的配置基本上不用动就能运行了。
初始化数据库
我初始化数据库是用安装包安装之后的脚本运行的。
理论上在源码里面有一个ThingsboardInstallApplication.java类,看样子像是初始化的。不过没尝试过。
用安装包安装之后的初始化脚本执行命令是
1
2
3
4
5
6
7
8
9
10
11
12
13
14
15
16
17
18
19
20
  C:\thingsboard>install.bat --loadDemo
  Detecting Java version installed.
  Detecting if it is 64 bit machine
  CurrentVersion
  Detecting if it is 32 bit machine
  CurrentVersion 1.8
  Java 1.8 found!
  Installing thingsboard ...
   ===================================================
   :: ThingsBoard ::       (v2.1)
   ===================================================

  Starting ThingsBoard Installation...
  Installing DataBase schema...
  Installing Cassandra DataBase schema...
  Loading system data...
  Installation finished successfully!
  2017-07-23 21:47:12,079 INFO  - Starting ServiceWrapper in the CLI mode
  2017-07-23 21:47:12,317 INFO  - Completed. Exit code is 0
  ThingsBoard installed successfully!
当然如果是linux的话执行
1
sudo /usr/share/thingsboard/bin/install/install.sh --loadDemo
启动
其实配置文件只用改数据库就行,然后找到ThingsboardServerApplication.java
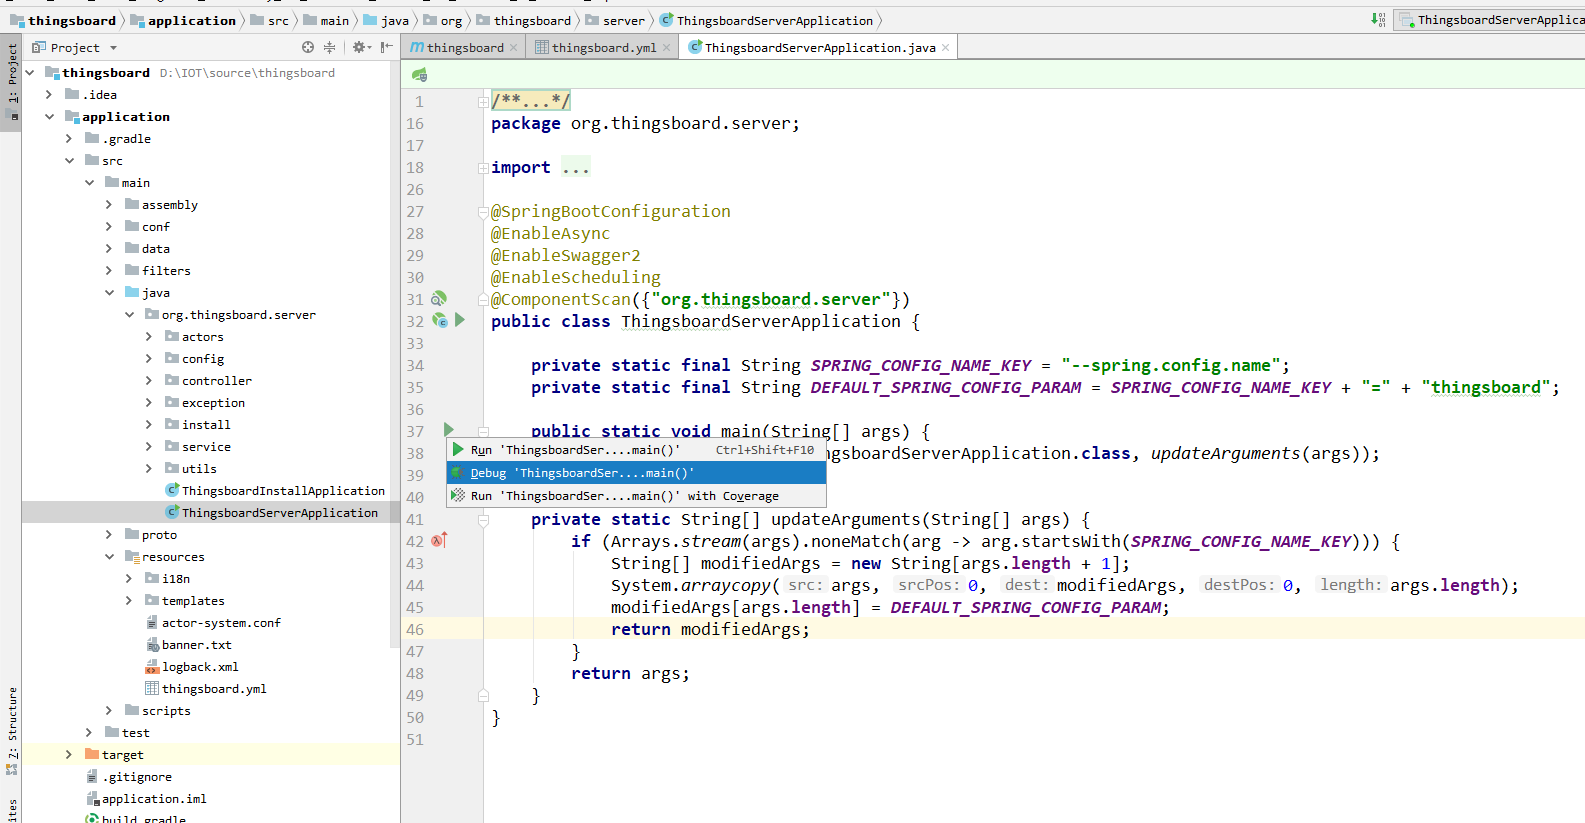
选中main方法,运行!
等待控制台中输出Tomcat started on port(s)就算是成功了。
1
2
3
4
5
6
7
8
2018-11-15 21:37:09,407 [main] INFO  o.a.coyote.http11.Http11NioProtocol - Initializing ProtocolHandler ["http-nio-0.0.0.0-8080"]
2018-11-15 21:37:09,430 [main] INFO  o.a.coyote.http11.Http11NioProtocol - Starting ProtocolHandler [http-nio-0.0.0.0-8080]
2018-11-15 21:37:09,431 [main] INFO  o.a.tomcat.util.net.NioSelectorPool - Using a shared selector for servlet write/read
2018-11-15 21:37:09,457 [main] INFO  o.s.b.c.e.t.TomcatEmbeddedServletContainer - Tomcat started on port(s): 8080 (http)
2018-11-15 21:37:09,465 [main] INFO  o.t.s.a.service.DefaultActorService - Received application ready event. Sending application init message to actor system
2018-11-15 21:37:09,466 [Akka-app-dispatcher-6] INFO  o.t.server.actors.app.AppActor - Starting main system actor.
2018-11-15 21:37:09,467 [main] INFO  o.t.s.ThingsboardServerApplication - Started ThingsboardServerApplication in 65.457 seconds (JVM running for 66.672)
2018-11-15 21:37:09,472 [Akka-app-dispatcher-6] INFO  o.t.server.actors.app.AppActor - Main system actor started.
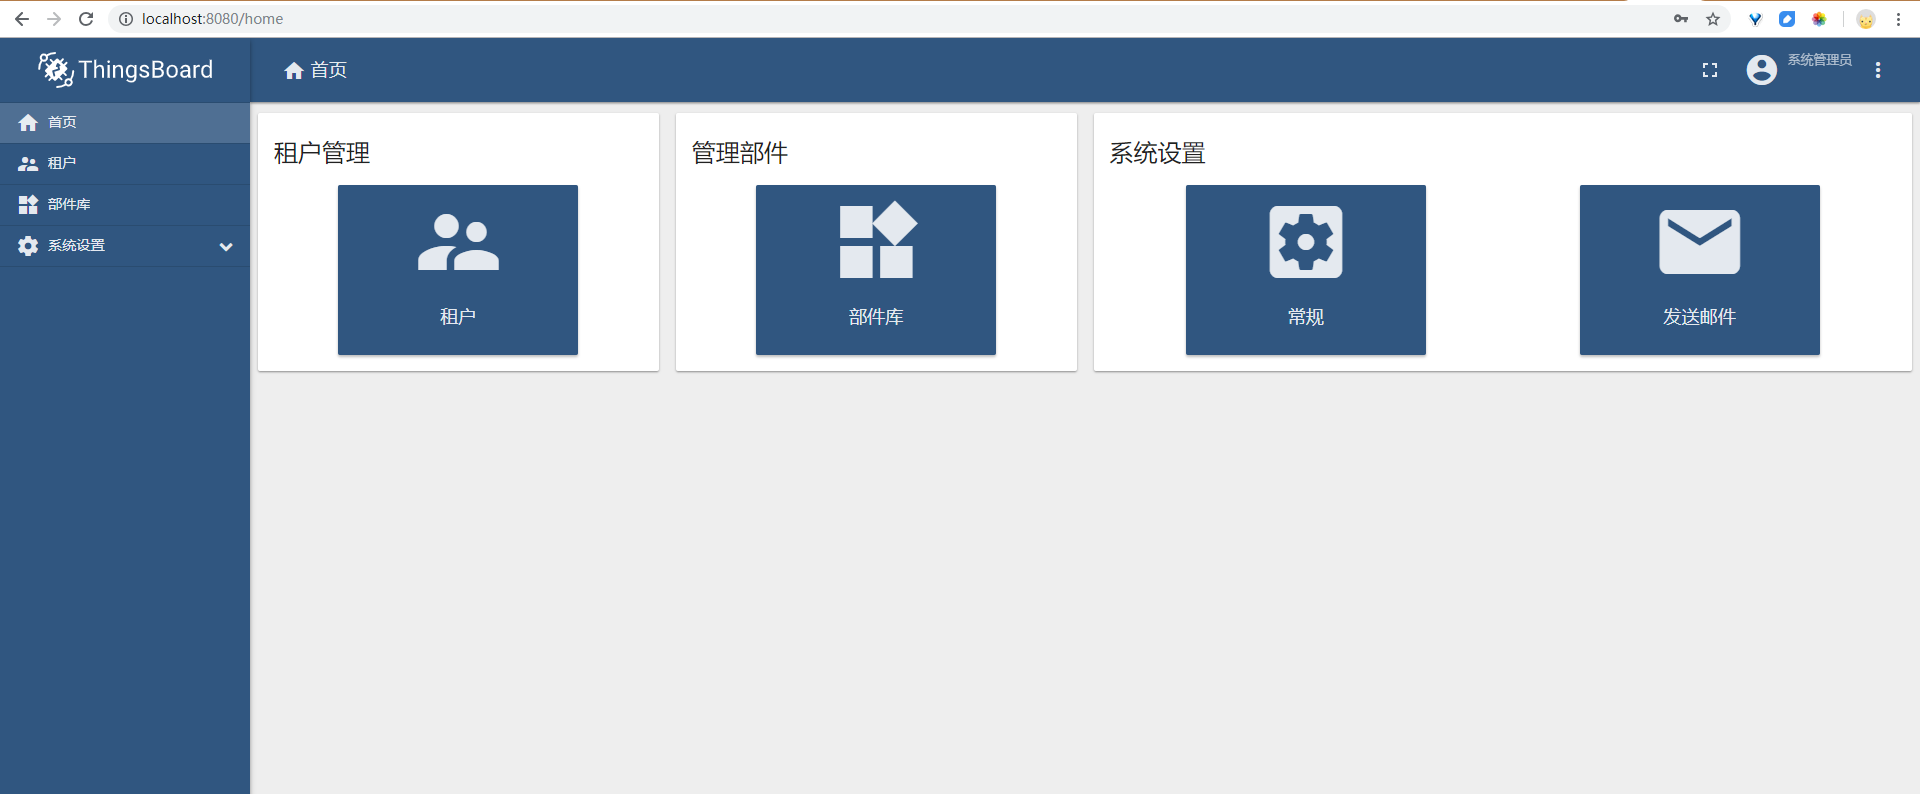
然后访问页面 http://localhost:8080

输入默认
用户名:sysadmin@thingsboard.org
密码: sysadmin
进行登录
管理员登录之后只有创建租户和一些简单的功能,如果需要使用具体功能需要创建租户,使用租户用户登录就行
创建好租户之后,使用租户管理员登录是如下页面
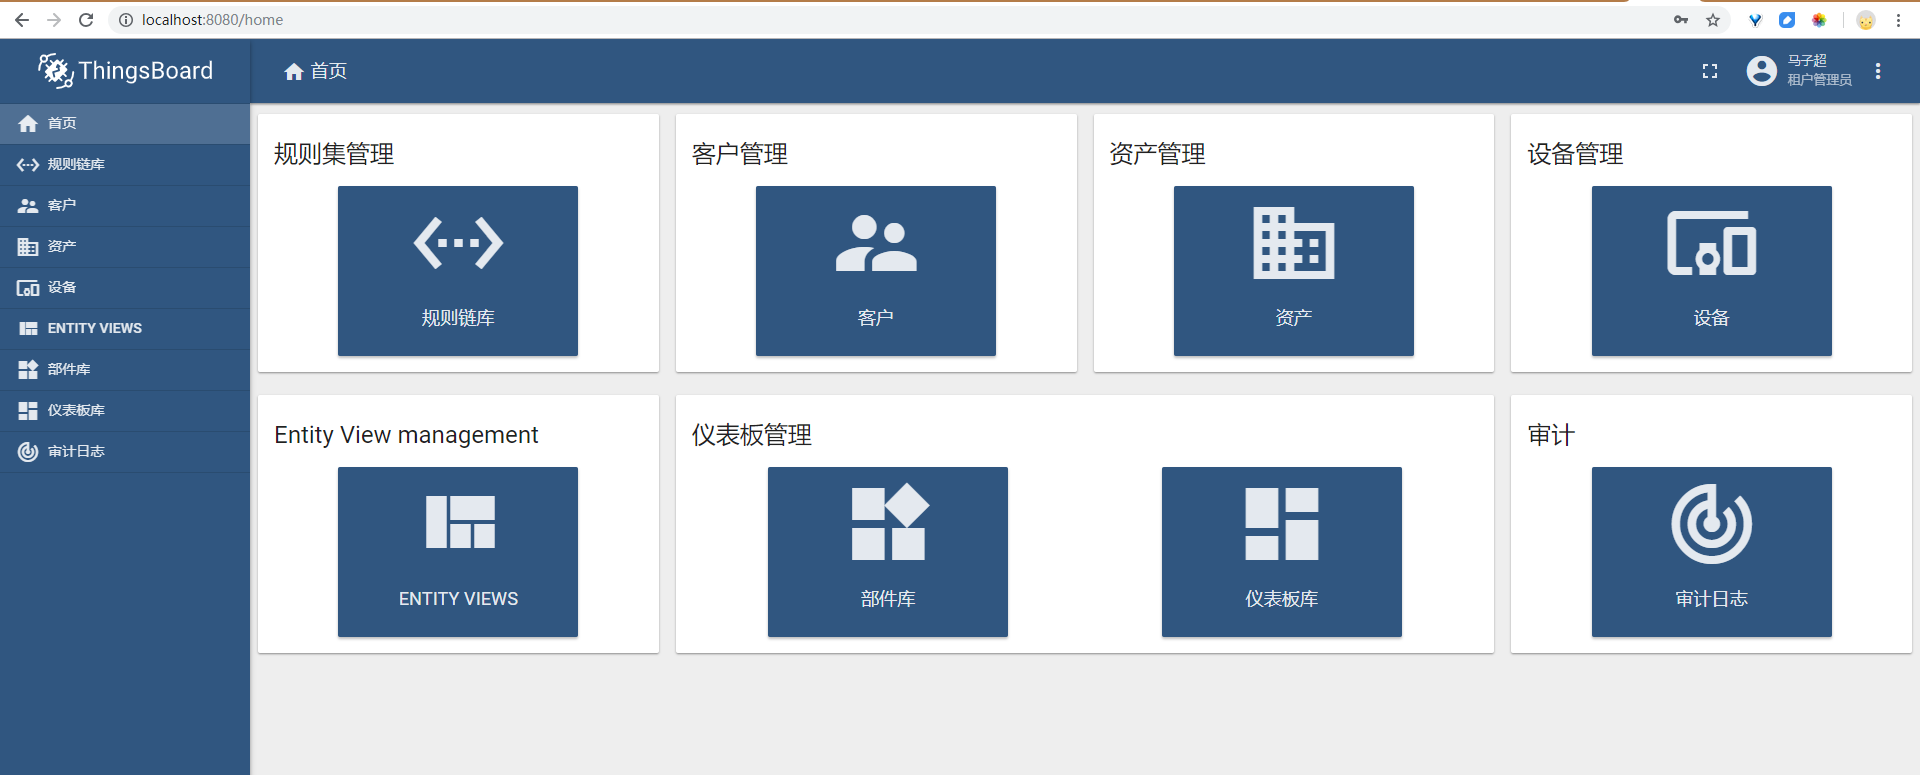
到这里,tb就可以用啦~